
No products in the cart.

Original price was: 98,00 €.78,00 €Current price is: 78,00 €. VAT incl.
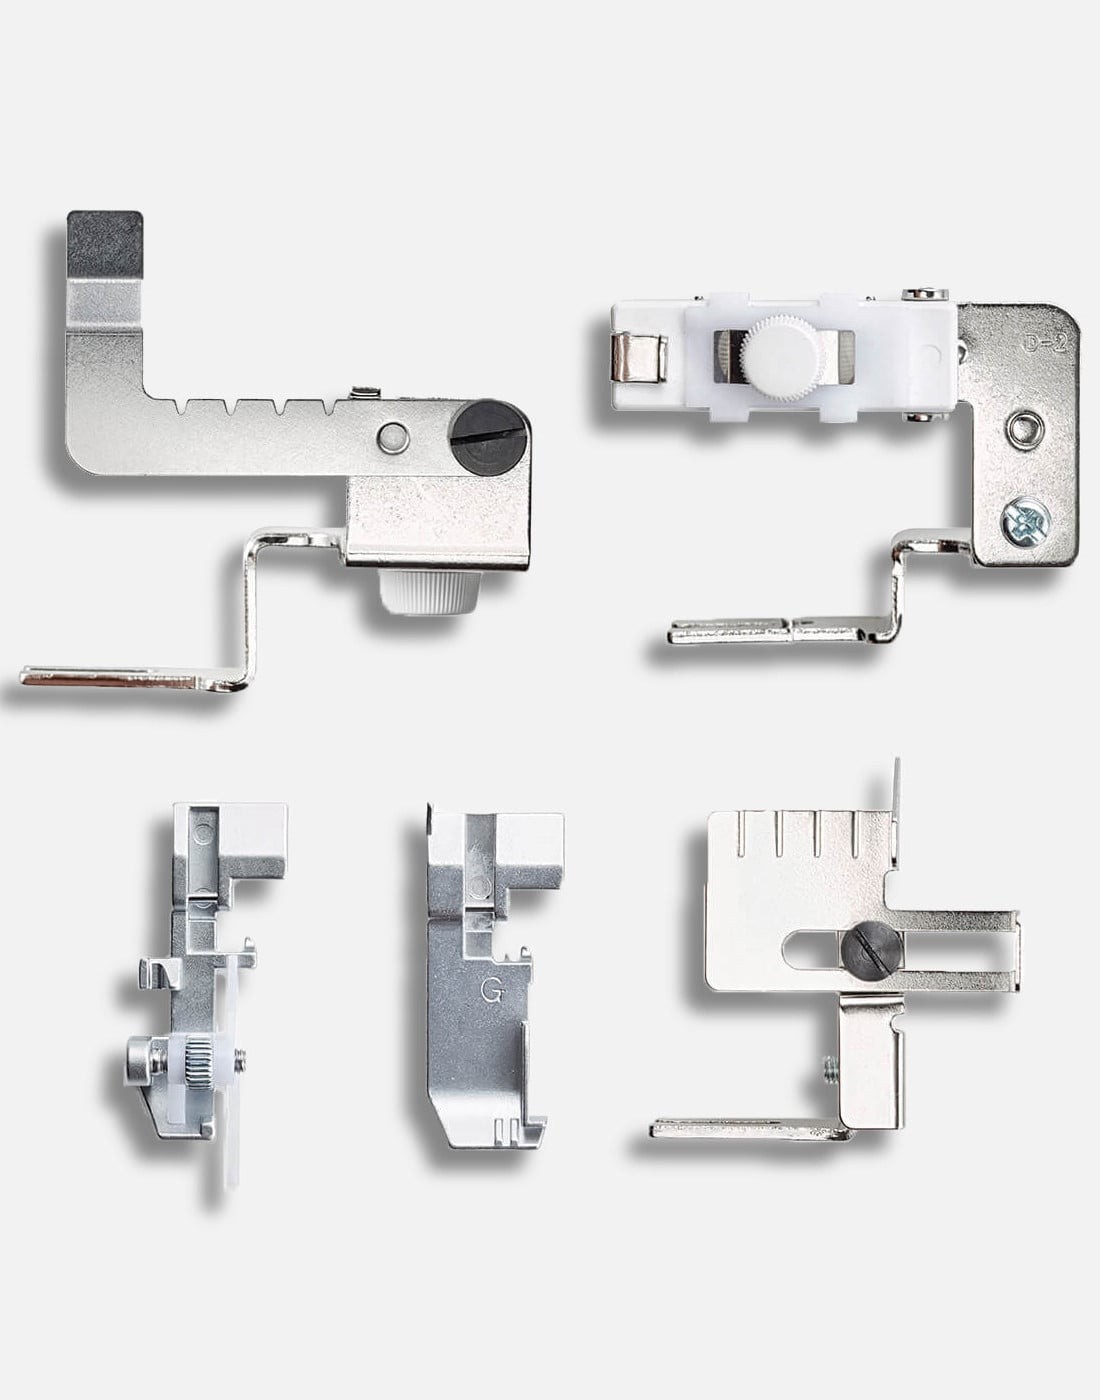
Kit 821220096 for the Pfaff Admire Air 5000 cut-and-sew machine that includes 5 accessories designed to make it easier for you to do hands-on sewing.
This kit is designed for the machine Pfaff Admir Air 5000 and includes 5 accessories, perfect for utility sewing.
What it includes:
How to use it
Curling accessory
1. Set the machine for 2-needle, 4-thread stitching.
2. To secure it, open the side cover. Loosen the fastening screw and rotate the accessory arm to curl toward you.
Place the fixing plate on the fixing screw, slide it to the left as far as possible, and tighten the fixing screw.
Then, lift the conveyor to the highest position by turning the handwheel toward you and loosen the thumbscrew.
For the last step, rotate the arm, place it on the conveyor, and tighten the thumbscrew.
3. To sew, place 2 pieces of fabric right sides together. The bottom fabric will be curled, so cut that piece twice the length of the top piece.
Do a trial run on a scrap of fabric from your project. Set the differential transport knob to 1 and rotate the arm outward.
Place the fabric under the presser foot and sew 2 or 3 stitches without inserting the arm between the fabric.
Then, turn the handwheel until the needle pierces the fabrics and raise the presser foot.
Set the differential feed knob to the desired number (such as 2.0) and insert the arm between the fabrics. Lower the presser foot and sew again, guiding the 2 layers with your hands.
Blind hem foot
1. Set the machine for 1-needle and 3-thread stitching (using the right needle).
2. Replace the presser foot with the invisible hem foot.
3. Fold the hem and iron. Fold the hem toward the right side of the fabric and place the fabric with the wrong side facing up so that the folded edge is to the left of the fabric guide.
4. Turn the adjustment screw until the needle catches only the edge of the crease.
5. Sew the hem, making sure the needle catches the edge of the hem.
6. Open the hem and iron.
Curling foot
1. Set the machine for 2-needle, 4-thread stitching.
2. To attach, position the presser foot so that the pin on the presser foot is just below the groove of the presser foot holder.
3. Lower the presser foot holder to lock the presser foot in place. Lift the presser foot to check that the presser foot is secure.
4. To remove, simply lift the needle and presser foot, then press the lever located on the back of the presser foot holder.
Elastic curling foot (Use 3.5 to 6.8 mm side elastic tape)
1. To set the elastic curl, open the side cover and loosen the fastening screw.
Place the fixing plate on the fixing screw and tighten the screw.
Next, place the elastic tape on the backing plate, matching the right edge of the tape to the line on the backing plate.
Pull about 2 inches of tape. Close the backing plate and fasten the end with the clasp. Adjust the sliding plate according to the width of the elastic tape. Make sure the tape is not cut by the top knife and close the side cover.
2. To sew, place the fabric under the elastic ribbon and place them under the presser foot. Sew the fabric and elastic ribbon together.
3. To adjust curl, turn the thumb screw clockwise to increase curl and counterclockwise to decrease curl.
Fabric guide
1. To fix, open the side cover, loosen the fixing screw and slide the fixing plate on the screw to the left as far as possible.
Tighten the screw and close the side cover.
2. To use, slide the fabric guide to the desired position to guide the fabric edge.
Do not use the top knife when sewing constant-width seams for overlock flat lock with decorative thread, pinktucking, etc.
| Weight | 1 kg |
|---|---|
| Dimensions | 15 × 20 × 5 cm |


