
No products in the cart.
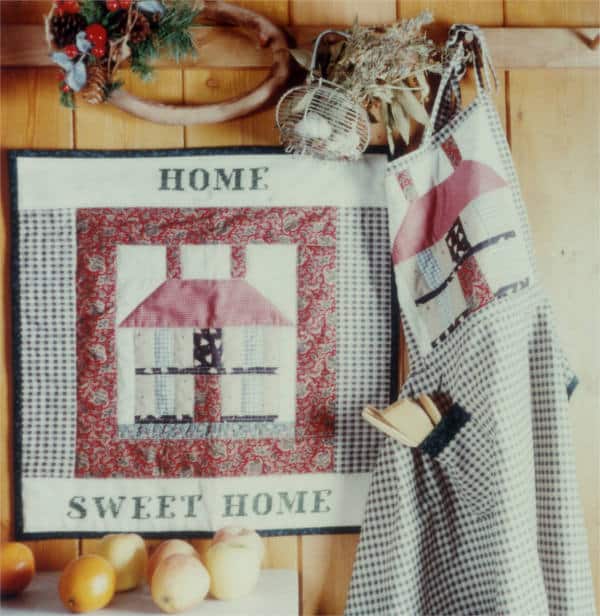
This “home sweet home” panel will bring a splash of color wherever you hang it in your kitchen. Choose the colors you like best to match your home and maybe even make an apron to welcome guests whenever you wear it.
Composition of a quilt
The quilt consists of a top part, patchwork or top, an inner part, batting, formed by the batting and a back part, the backing. Once the quilt is made, stitching or quilting is done on the patchwork, which is intended to hold the three layers (fabric and batting) together and reinforce the seams,as well as to embellish it with various designs. Each finished section of patchwork is called a block. The ironing done each time you sew one piece joined to another is important.
Caution. The margin for stitching should always be 6 millimeters, and hems should be ironed together in the direction of the darker-colored fabric, unless otherwise specified.
Accuracy of cutting, stitching and ironing are critical to the success of a good quilt.
Sewing with a sewing machine
Each part of the patchwork should be sewn to another by overlapping the fabric straight and leaving a hem, with a distance from the machine needle to the edge of the fabric of 6 millimeters. So position the needle so that you have this measurement; a thin strip of tape affixed to the sewing machine plate can help you and thus have a steady guide or better yet a machine that has the so-called patchwork foot. Stop the beginning of the stitching with a forward and a backward stitch and set the stitch length selector to 2.5 as if it were doing a normal hemstitching. When you sew patchwork blocks together one with another, it will be helpful to stop them by using quilting pins.
The technique of quilting (stitching)
Quilting should be done when the quilt is completed, but before adding the last reinforced border or binding. It can be done along or alongside the patchwork seams, following the design of each block. It achieves the effect of emphasizing the details of the patchwork and is best done by hand. Those more experienced with sewing machines can achieve the same effect by using stitch length slightly longer than for a hem. If you want to decorate the patchwork, especially the borders, with special embellishments, first carry the stencil design (the template) for quilting on the top with an erasable pencil and do the stitching on the pencil mark.
The stitching
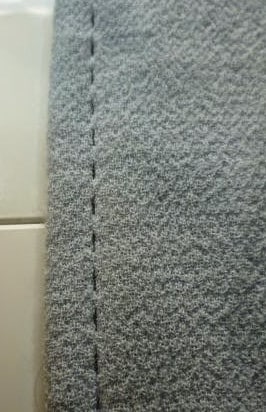
It is very important to make stitches as small as possible and all the same length. This skill is acquired with lots of practice and with the use of special needles (quilting needles) of smaller and smaller size. To begin with, a #10 or 12 needle can be used. Usually a frame is used without overstretching the area over which you are to work. The purpose of the loom is to keep the three layers of the quilt even. Tip: If it is difficult for you to use the loom you can do without it for smaller quilts. Be careful, however, by running your hand under the quilt, that the backing fabric is always tight and wrinkle-free. If, on the other hand, you want to speed things up, your best bet is a good sewing machine that has quilt stitches as several Juki models o Pfaff and in particular the stitch imitating handmade topstitching to be made with clear thread.
The stitch that succeeds in imitating quilting or handmade stitching that
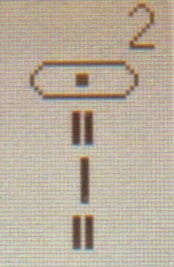
you have to look for on the sewing machine is similar to what you see in the image opposite.
1. Take a portion of yarn about 46 cm make a knot at the end. Start from the center of the work. Thread the needle from the wrong side in the direction of the top and lightly pull the thread until the knot passes the backing fabric and stops in the batting. The quilt should be perfect from both the right and reverse sides.
2. Insert the needle through the three layers by threading it through the top with the help of the thimble. When the needle reaches the other hand, which is to be held on the reverse side of the quilt, push it back to the top to make another stitch. Repeat until you have over the needle 3/4 stitch. (Fig. 1-2-3)
3. Once you have finished another work area or run out of thread,tie a small knot near the surface of the top by wrapping the thread around the needle 3 / 4 times and pulling the needle. Make a small backward stitch and pull the knot inside the quilt so that it remains hidden in the batting. Cut the thread at the height of the top.
4. Once the stitching is finished,cut the bottom two strips of fabric and padding to even them out at the top.
The use of the disc cutter (rotary cutter*)
An acrylic ruler is used to hold the fabric to be cut in place to serve as a guide. To cut, it is necessary to stand so that you have a better view of the fabric,the size of the cut and for more control of the cutter. As you become more experienced, you will be able to cut several layers of fabric at once. *Keep away from children and people inexperienced in using it.
The cottage block
Instructions are to create two little houses at the same time.
Windows: Cut a strip of 7.5×40.5 cm. Cut it into 8 rectangles (a) of 4.5×7.5 cm.
Walls: Cut two strips of 7.5×40.5 cm. Cut them into 16 rectangles (b) of 4.5×7.5 cm.
Upper door: Cut two rectangles (c) of 9×5.5 cm
Lower door: Cut two rectangles (d) of 10×5.5 cm
Fireplaces: Cut a strip of 6.5×15.5cm. Cut it into four rectangle(s) of 4×6.5cm
Lower balcony: Cut two strips (f) of 3×30.5cm. Cut them in half
Upper balcony: Cut two strips (g) of 2.5×25.5 cm
Roof: Cut two strips (h) of 9x29cm
Sky: Cut four squares (i) of 9 cm. Cut six rectangles (l) of 6.5×9 cm.
Soil: Cut two strips (m) of 5×30.5 cm
Completion of the blockade
Squaring means checking that each side of a section is equal to the others. It is possible to correct any imperfections by trimming or ironing, but sometimes you need to re-stitch.
Upper part of the house
Lower part of the house
Iron Roof
Warning- For the apron bib, do not add the ground because it would come out exaggeratedly large.
The addition of the side borders
Sewing The completion of the panel
4. The addition of the reinforced edging
Sew two curtain rings on the reverse side and lo and behold, your panel is ready to hang!
The apron
After finishing the little house block as already done for the panel follow the instructions below to make the apron.
Accessories
Pdf diagrams to download for the quilt-sweet-home


